Top Tools for Creating Minimalist Nail Designs
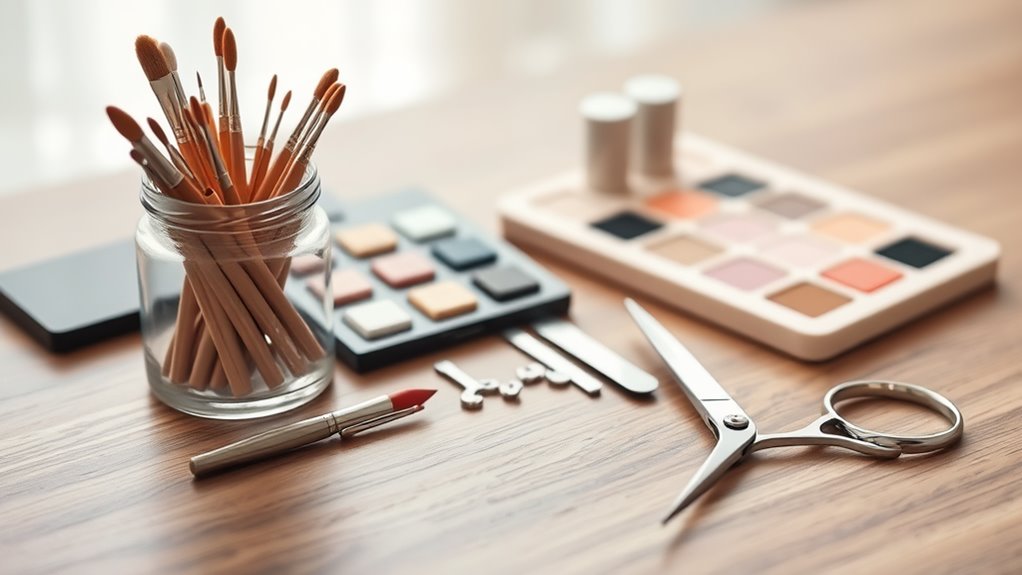
To create minimalist nail designs, you’ll want some essential tools. Nail art brushes are perfect for precise details, while dotting tools help you add fun dots. Don’t forget striping tape for those sharp lines and nail stencils that make complex shapes easy. Choose a soft color palette to keep things chic. A good nail file and buffer will prepare your nails, and quick-dry solutions save you from smudging. Finally, cleanup tools are key for a neat finish. With these handy items, you’ll be designing like a pro in no time, and there’s more to discover about taking your nail game even higher!
Nail Art Brushes

Nail art brushes are essential tools that can elevate your minimalist nail designs with precision and ease. When you want to create those sleek lines or tiny details, these brushes are your best friends. They come in various shapes and sizes, so you can choose the right one for your design.
For example, a fine detail brush works wonders for those delicate accents, while a flat brush can help you cover more area quickly.
Don’t worry if you’re new to this; using nail art brushes isn’t as tricky as it sounds. You’ll just need a steady hand and a little practice.
Start by dipping your brush into your favorite polish, then gently apply it to your nails. If you make a mistake, simply wipe it off and try again. It’s all part of the fun!
Dotting Tools

When it comes to adding playful elements to your minimalist nail designs, dotting tools are a fantastic choice. These little wonders let you create perfect dots, which can really make your nails pop! You might think they’re just for fancy designs, but they can be the star of minimalist art too.
With a dotting tool, you can easily make different-sized dots, which opens up a world of creativity. You can use them to create simple polka dots, or even cute flowers, without overwhelming your nails. Just dip the tool in your nail polish, and gently press it onto your nail. It’s that easy!
Plus, you can experiment with colors; try contrasting shades for a bold look or stick to one color for a more subtle vibe. If you mess up, don’t worry! Nail polish can be removed, and you can always try again.
Just remember, practice makes perfect. So, grab those dotting tools, and let your imagination run wild! With a little bit of patience and some dotting magic, you’ll have beautiful minimalist designs that are uniquely yours. Happy dotting!
Striping Tape

For those looking to elevate their minimalist nail designs, striping tape is an essential tool that can add sleek lines and geometric flair. This thin, sticky tape is perfect for creating sharp, straight lines that make your nails pop. You’ll love how easy it’s to use! Just cut a piece of tape to the right length, stick it on your nail, and paint over it.
Once your polish is dry, carefully peel off the tape to reveal a clean, professional-looking design. You can create all sorts of fun patterns—think stripes, triangles, or even checkerboards! Plus, it’s great for dividing colors, so you can mix and match shades without worrying about them blending together.
Don’t forget to apply a top coat afterward to seal your design and keep it looking fresh. If you mess up, don’t sweat it! Just peel off the tape and try again. Striping tape is super forgiving, making it perfect for beginners.
Nail Stencils

Often overlooked, nail stencils are a game-changer for creating intricate and stunning designs with minimal effort. These handy tools can transform your nails into mini works of art without needing a degree in nail design. They come in various shapes and sizes, from simple geometric patterns to cute animals. It’s like having a secret weapon in your nail art toolkit!
Using nail stencils is super easy. First, paint your base color and let it dry completely. Next, place the stencil on your nail and press it down gently. Then, apply your second color over the stencil. Once you peel it away, voilà! You’ve got a perfect design. It’s a fun way to express yourself without spending hours on your nails.
If you mess up, don’t worry! Just use a little polish remover to clean it up and start again.
Plus, you can mix and match stencils to create unique looks, and that’s where the real fun begins. So go ahead, grab some stencils, and let your creativity flow. Your nails will be the talk of the town, and you might even inspire your friends to join in on the fun!
Color Palette Selection

Selecting the right color palette for your minimalist nail design can make all the difference in achieving a chic and polished look. Think of it as choosing an outfit for a special occasion—every color plays a role!
To start, you might want to pick a base color. Soft pastels or classic neutrals often work well. They’re like the little black dress of nail colors—effortlessly stylish!
Next, consider adding a pop of contrasting color. Maybe a bold red or a bright yellow? Just a tiny bit can make your nails stand out without being too loud.
You can also experiment with shades that complement each other. For instance, a light pink paired with a deeper mauve creates a lovely gradient effect.
Top Coat Options

A well-chosen top coat can elevate your minimalist nail design, enhancing the colors and adding that final touch of sophistication.
You’ve put in the work to create a stunning look, so don’t skip this important step! There are several options to evaluate.
First up, a glossy top coat gives your nails a shiny finish that makes colors pop. It’s like the cherry on top of a sundae, making everything look super polished.
If you’re feeling adventurous, try a matte top coat for a chic, understated vibe. It transforms your shiny colors into something unique and elegant.
For those who love a bit of sparkle without going overboard, a shimmer top coat can add just the right amount of glimmer. Think fairy dust, but for your nails!
Lastly, think about a quick-dry top coat if you’re short on time. It saves you from waiting around, so you can get back to your busy day.
Just remember, no matter which top coat you choose, applying it evenly is key. So grab your brush, and let’s seal the deal on that minimalist masterpiece!
Nail File and Buffer

When it comes to achieving a flawless minimalist nail design, having the right nail file and buffer is essential. You might think these tools are just boring, but they’re your best friends in the nail world! A good nail file helps shape your nails perfectly, so they look clean and chic. You don’t want jagged edges ruining your sleek style, right?
Choose a file with the right grit—maybe a finer one for those delicate touches. Remember, it’s not a race; take your time and enjoy the process!
After filing, grab a buffer. This magical tool smooths out any rough spots and gives your nails a lovely shine. It’s like giving your nails a mini spa day. Who doesn’t love that?
Using a buffer is super easy, and it can transform your nails from “meh” to “wow!” Just be gentle; you don’t want to overdo it. A few swipes should do the trick.
Quick-Dry Solutions

After you’ve shaped and buffed your nails to perfection, the next step is ensuring your minimalist design dries quickly and flawlessly. You don’t want to smudge that cute design, right? That’s where quick-dry solutions come in handy!
First, consider using a fast-drying topcoat. These magical potions can cut drying time dramatically. Just apply a thin layer over your nail art, and voilà! Your nails will be ready for action in no time.
Another great trick is to use cold air. Yup, you heard that right! If you’ve got a hairdryer, switch it to the cool setting and gently blow air over your nails. It’ll help speed things up without turning your pretty design into a puddle.
You can also dip your nails in ice water for a few minutes. Just fill a bowl with cold water and ice, then stick your fingers in. It’s like a mini spa day for your nails!
Clean-Up Tools

Having the right clean-up tools can make all the difference in achieving a polished minimalist nail design. You want to look chic, not like you’ve just done finger painting!
First up, grab some cotton swabs or cotton pads. They’re perfect for touching up those little mistakes that happen when you’re applying polish. Just dip one in nail polish remover, and you’re ready to go.
Next, consider a cleanup brush. These are thin, angled brushes that let you get into those tricky spots around your cuticles. A little practice, and you’ll feel like a nail art pro!
Don’t forget a good-quality nail polish remover, too. The faster it works, the easier your cleanup will be.
Lastly, keep a small bowl of remover nearby. It can help you dip your brush in without making a mess.
Remember, even the best artists have to clean up a bit! With these tools, you’ll keep your nails looking neat and sleek, making your minimalist designs shine.
Inspiration Sources

Once your clean-up tools are in place, finding inspiration for your minimalist nail designs can elevate your artistry even further. You don’t have to look far! Start by browsing social media platforms like Instagram and Pinterest. These sites are full of stunning nail art photos that can spark your creativity. Just type in “minimalist nail designs,” and you’ll find endless ideas.
You can also check out nail art blogs or YouTube channels. Many artists share tips and tricks, along with their own unique designs. This can be super helpful if you want to learn new techniques or see how to achieve that perfect look.
Don’t forget about nature! Sometimes, the simplest things, like a flower or a sunset, can inspire beautiful nail designs. Grab a sketchbook and doodle what you see.
Lastly, your own wardrobe can serve as a great source of inspiration. If you wear a cozy sweater or a cool pair of shoes, think about how those colors or patterns could translate onto your nails.
Conclusion
Now you’re all set to create stunning minimalist nail designs! With the right tools, like nail art brushes and dotting tools, plus a splash of creativity, your nails can become a canvas of simple beauty. Don’t forget to keep your color palette fresh and clean-up tools handy for those little oops moments. Remember, practice makes perfect! So grab your supplies, and let those nails shine with your unique style. Happy nail designing!


