Creative Ways to Customize Solid Color Nails
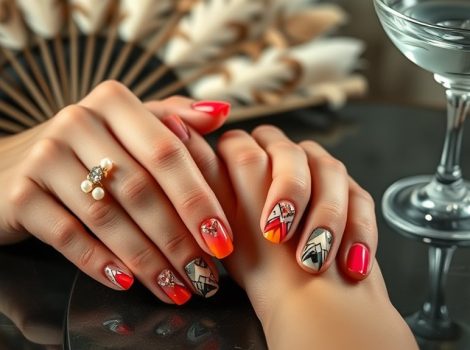
You’ve got solid color nails, but let’s jazz them up! You can create geometric patterns with tape or brushes, or try an ombre effect for a cool, blended look. Nail art stickers are a fun way to add flair without any hassle. Don’t forget about mixing matte and glossy finishes for contrast—it’s super trendy! Textured topcoats can also give your nails a unique touch. If you’re feeling fancy, add some rhinestones or metallic accents for sparkle. The possibilities are endless, so let your creativity shine and discover even more fun ideas to transform your nails!
Add Geometric Patterns

If you want to elevate your nail game, adding geometric patterns is a fun and stylish way to do it. You don’t need to be a professional artist to create these cool designs; it just takes a bit of practice and some creative flair.
Start with a solid color base, maybe a bright blue or a classic black. Once that’s dry, grab some nail tape or a thin brush.
Now, get ready to release your inner Picasso! You can create triangles, stripes, or even zigzags. Just imagine the possibilities! If you mess up, no worries—just use a little polish remover and try again. A simple triangle design can make your nails look super chic.
Or, why not try a bold chevron pattern? It’s like wearing a little piece of art on your fingertips!
Don’t forget to seal your masterpiece with a topcoat. This keeps your geometric designs looking sharp and shiny. Plus, it’ll make your friends wonder how you got so good at nail art!
Experiment With Ombre Effects

Ombre effects can transform your nails into a stunning gradient masterpiece that’s sure to catch everyone’s eye. If you’re ready to give your nails some flair, this technique is a fun way to do it! You can choose two or more colors that blend well together, like pink fading into purple or blue melting into green. The key is to create a smooth progression between the shades.
To start, paint your nails with a base coat, and let it dry completely. Next, get a makeup sponge, and apply your chosen colors side by side on the sponge. Then, gently dab the sponge onto your nails, rolling it slightly to mix the colors. Repeat this process until you achieve the desired gradient effect.
Don’t forget to finish with a top coat to seal your work!
If things get a little messy, don’t worry! Just use a cotton swab dipped in nail polish remover to clean up around your nails. Ombre nails might take a little practice, but once you nail it, you’ll be thrilled with the results. Your friends will be asking how you did it, and you’ll feel like a nail art pro!
Incorporate Nail Art Stickers

Nail art stickers are a quick and easy way to elevate your manicure in just a few minutes. If you’re looking to add some flair to your solid color nails, these little gems are perfect. You can find stickers in all shapes and sizes, from cute hearts to bold geometric patterns.
First, make sure your nails are clean and dry. Then, pick out the stickers that catch your eye. You might want to mix and match different designs for a fun look. Carefully peel off the sticker and place it on your nail. Press it down gently, and voilà! You’ve got instant nail art.
If you’re feeling adventurous, try layering multiple stickers or placing them at angles. You can even create a theme, like beach vibes with palm trees or a galaxy with stars.
Just remember to seal it all in with a clear topcoat. This helps the stickers last longer and keeps everything looking neat.
Use Matte and Glossy Finishes

Two finishes can completely transform your manicure: matte and glossy. If you want to switch things up, these two styles are just what you need.
Glossy nails give off a shiny, polished look that catches the light beautifully. It’s like having a mini disco on your fingertips! Plus, glossy finishes can make your solid color nails appear vibrant and fresh.
On the other hand, matte nails offer a chic, sophisticated vibe. They’ve a soft, velvety texture that looks elegant and unique. Imagine showing off a stunning matte red; it’s bold but in a subtle way.
You can even mix and match! Try painting your nails glossy and then using a matte topcoat on just one accent nail. This combo creates a fun contrast that’ll have everyone asking where you got your nails done.
To achieve these looks, you can find matte and glossy topcoats at your local beauty store. Just remember, the key is to have fun experimenting with both finishes.
Try Textured Nail Products

When it comes to adding dimension to your manicure, textured nail products are an exciting option worth exploring. These products can transform your solid color nails into a work of art! You can find a variety of textured finishes, like sand, glitter, or even a 3D effect that feels like magic on your fingertips.
To get started, think about what kind of texture you want. A sandy finish can give you a beachy vibe, while a glittery top coat adds a touch of sparkle, perfect for a night out. You can also try nail foils or decals, which can create fun patterns and designs without much effort.
Applying textured nail products is super easy. Just paint your base color first, let it dry, and then add your chosen texture. You’ll be amazed at how quickly your nails go from plain to wow!
Plus, they can be a great conversation starter. Who doesn’t want to show off their unique nails? So go ahead, grab some textured products, and let your creativity shine. Your nails will thank you, and your friends will be asking where you got your fabulous look!
Create Negative Space Designs

Negative space designs are a trendy way to elevate your manicure while showcasing your natural nail. Instead of covering your entire nail with polish, you leave some parts bare, creating cool shapes and patterns. This style lets your creativity shine through, and it’s surprisingly simple to achieve!
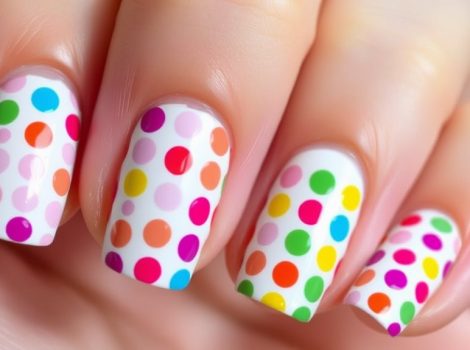
Start by painting your nails a solid color, maybe a bold red or a soft pastel. Once it’s dry, use striping tape or even a tiny brush to create shapes. You could make triangles, stripes, or even polka dots!
After you’ve taped off the areas you want to stay bare, paint over the rest with a different color. When you peel off the tape, you’ll reveal the negative space design. It’s like magic!
If you’re feeling daring, try mixing up the colors or using a matte topcoat for the bare parts to give a unique look. Just remember to keep your design balanced.
Too much negative space can look messy, while too little may not have the same impact. So, go ahead and play with this fun technique; your nails will definitely be the talk of the town!
Embellish With Rhinestones

Transforming your nails into a dazzling masterpiece is easy with rhinestones. These little gems can take your solid color nails from plain to fabulous in no time! You don’t need to be a nail artist to add some sparkle.
Start by choosing a color that complements your nail polish. Then, gather your rhinestones, a toothpick, and a clear topcoat.
First, apply your solid color polish and let it dry completely. Once it’s dry, use the toothpick to pick up a rhinestone and gently place it on your nail. You can create patterns, like a line down the center or a cluster at the base. The more, the merrier! Just remember, less can be more if you prefer a subtle look.
After you’ve arranged your rhinestones, seal everything in with a clear topcoat. This not only protects your design but also gives it a glossy finish.
And voilà! You’ve turned your nails into a sparkling work of art. Just be careful not to bump them until they’re dry, or you might end up with a rhinestone on your couch instead of your nail!
Have fun and let your creativity shine!
Paint With Metallic Accents

Adding metallic accents to your nails can instantly elevate your manicure to a chic and stylish look. You don’t need to be a professional to achieve this. Just grab some metallic nail polish or even nail pens for an easy touch-up!
Start with a solid color base, like a deep blue or classic red. Once that’s dry, it’s time to get creative! You can paint thin stripes along the edges, or even create dots for a fun polka-dot effect. If you’re feeling adventurous, try painting geometric shapes. You’ll look like you just walked out of a fashion magazine!
For a more subtle approach, consider using metallic polish for just one accent nail on each hand. This adds flair without going overboard. Remember, less is sometimes more—like those times you try to eat one potato chip and end up eating the whole bag!
Lastly, don’t forget to seal your masterpiece with a clear topcoat. This keeps your metallics shining bright and prevents chipping.
Explore Color Block Techniques

Color blocking is a fun and bold way to make your nails stand out. Instead of just one solid color, why not mix a few shades? You can create eye-catching designs that are sure to grab attention. Start by choosing two or three colors that go well together. Think bright pinks with sunny yellows or cool blues with soft greens.
Once you’ve picked your colors, apply a base coat to protect your nails. Then, use tape to section off your nail into different shapes. You can make triangles, squares, or even wavy lines! After taping, paint each section with your chosen color. When you remove the tape, you’ll reveal a stunning color-block design.
Don’t worry if you make a mistake; nail polish remover is your best friend! To add an extra touch, finish with a glossy top coat. It’ll help your design shine and last longer.
Conclusion
So, there you have it! Customizing your solid color nails is super fun and easy. Whether you’re adding cool geometric patterns or using shiny rhinestones, you can let your creativity shine. Don’t be afraid to mix things up with textures or colors. Remember, your nails are like a blank canvas waiting for your unique designs! So grab your nail polish and get started—you’re just a brush stroke away from nail art greatness! Happy painting!


